Clear Sky Science · en
Defining operational safety in clinical artificial intelligence systems
Why Safe AI in Medicine Matters
Hospitals are rapidly adopting artificial intelligence to read scans and flag disease, but there is a question that ordinary accuracy scores cannot answer: when is it actually safe to let the machine make the call? This paper introduces a practical way to decide when doctors can confidently rely on an AI system, when they should ignore it, and when they must take a closer look themselves. The goal is not simply to build smarter algorithms, but to embed them into daily care in a way that protects patients, reduces unnecessary testing, and eases the burden on clinicians rather than adding to it.
From One Score to Three Clear Action Zones
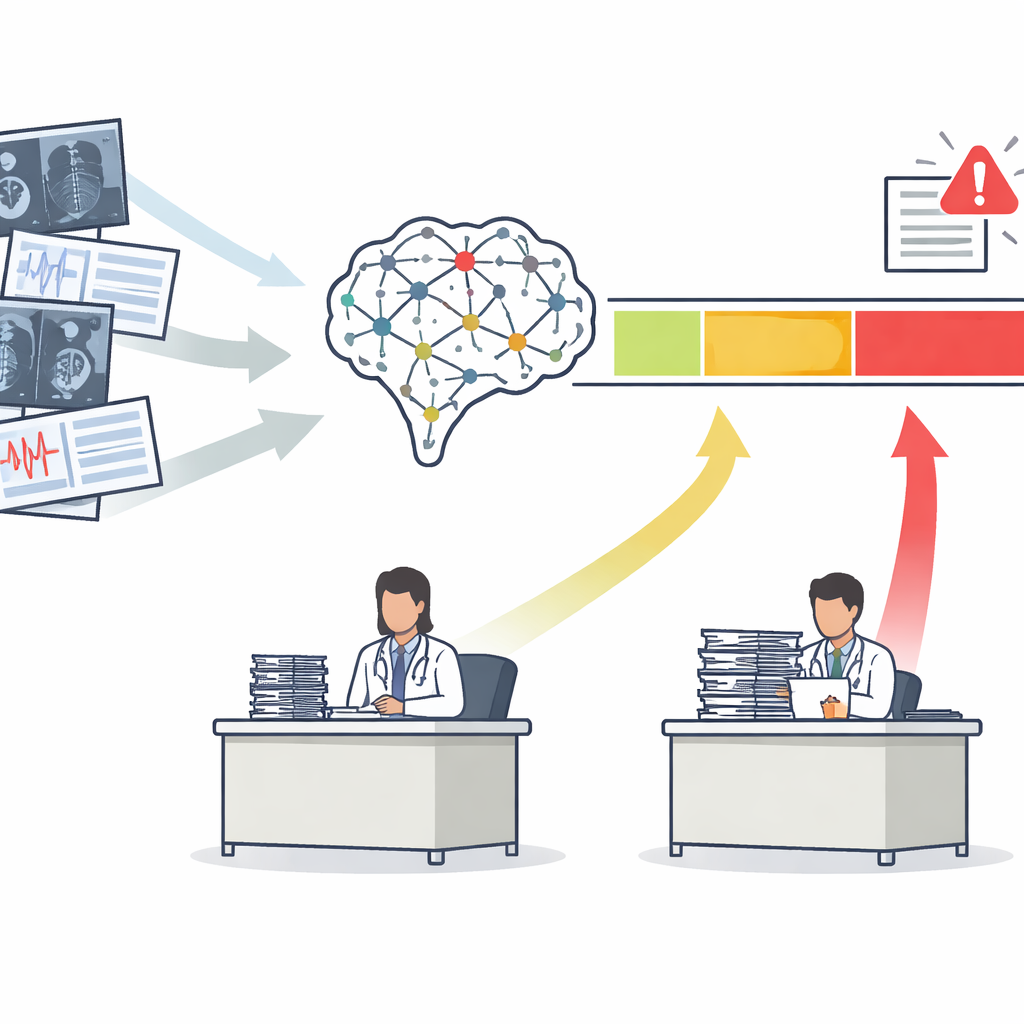
Most medical AI tools output a single risk score, such as the chance that a mammogram shows cancer. Traditionally, developers judge these tools with a curve that summarizes how well they separate sick from healthy patients overall. The authors argue that this is not enough. They propose the Safety-Aware ROC (SA-ROC) framework, which starts with the same risk scores but reshapes them into three practical regions. A high-score "rule-in" zone contains patients whose results are reliable enough to trigger action, such as urgent follow-up. A low-score "rule-out" zone contains patients whose results are reliable enough to safely de-prioritize. Between them lies a "gray zone" of uncertainty, where the AI is not trustworthy enough and a human expert must review the case.
Letting Clinicians Set the Safety Bar
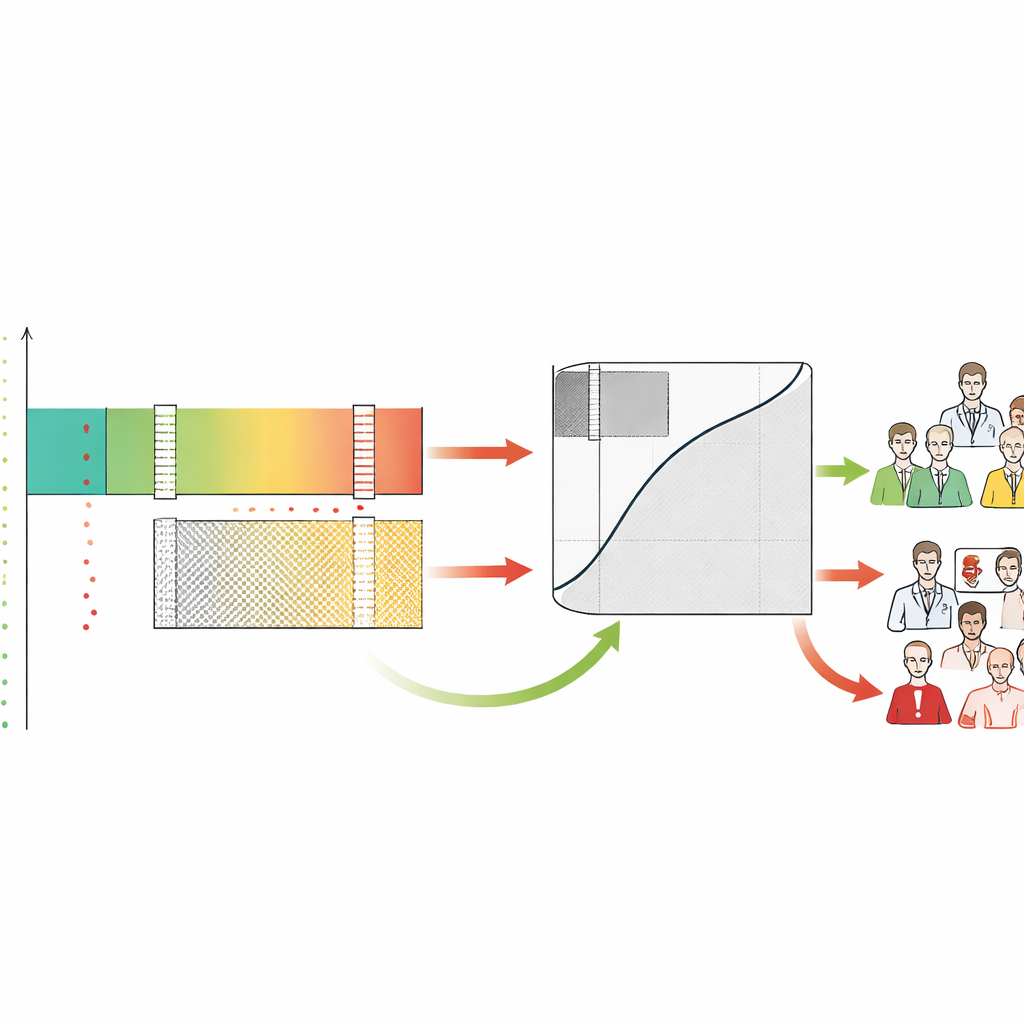
Crucially, SA-ROC allows clinicians and institutions to define their own safety targets up front. They choose how sure they want to be before acting on a positive result (the minimum acceptable chance that a flagged finding is truly abnormal) and how sure they want to be before relaxing on a negative result (the minimum acceptable chance that a cleared case is truly normal). Given these targets, the framework searches through the model’s scores to find the exact boundaries that satisfy them. Scores above the upper boundary form the rule-in safe zone, scores below the lower boundary form the rule-out safe zone, and everything in between becomes the gray zone. The framework then quantifies how many patients land in each region and how much uncertain workload—cases sent back to humans—the AI leaves unresolved.
Revealing Hidden Differences Between Similar AIs
The authors show that two AI systems with nearly identical traditional accuracy can behave very differently when viewed through this safety lens. In simulations, models with the same overall performance produced very different sizes of rule-in, rule-out, and gray zones depending on how their scores were distributed. One might excel at confidently confirming disease, while another might excel at safely clearing large numbers of low-risk patients. In a real-world case study of two U.S. Food and Drug Administration–cleared tools for breast cancer screening, the system with the higher standard accuracy score was actually worse for high-confidence screening. At the strictest safety setting—allowing no missed cancers in the low-risk group—the supposedly weaker system safely removed nearly twice as many women from the radiologist’s queue. SA-ROC thus exposes a kind of "performance reversal" that conventional metrics hide.
Understanding Human–AI Tension and Workload
By labeling each case as rule-in, rule-out, or gray, the framework also reveals how human doctors behave in these zones. The authors found that radiologists often overcalled cases that the AI judged safely low-risk, generating many false alarms in the very region where the machine was most reliable. In contrast, both humans and AI struggled in the gray zone, validating it as the area that truly needs expert attention. SA-ROC captures the size of this gray zone in a single number, which represents the cost of indecision. A small gray zone means more safe automation and less human workload; a large gray zone means that many cases still require careful manual review and that the system may increase burnout instead of relieving it.
Turning Safety Rules into Everyday Practice
Beyond measurement, the framework is designed as a governance tool that turns policies into concrete AI behavior. Hospitals can use it in two ways. First, they can directly specify safety requirements or limits on how many cases they are willing to send to the gray zone and let the framework compute the corresponding thresholds. Second, they can assign values and penalties to different outcomes—catching a cancer, missing one, ordering an unnecessary test, or deferring to human review—and have the framework search for the policy that maximizes overall benefit. These strategies can be tuned for very different goals, such as mass screening programs, specialist referrals, or research cohorts, all using the same underlying model.
What This Means for Patients and Clinicians
In plain terms, this work offers a way to say not just "this AI is accurate", but "here is exactly when and how it can be trusted in the clinic". By carving AI outputs into safe, unsafe, and uncertain regions tied to explicit safety promises, SA-ROC helps health systems decide when machines may act on their own and when humans must stay firmly in control. It highlights that traditional accuracy scores can be misleading and that real safety depends on how a model behaves at the extremes where errors are most costly. If widely adopted and validated in larger, real-world settings, this framework could support more reliable automation, reduce unnecessary alarms and tests, and turn the hardest AI cases—the gray zone—into a focused source of learning and improvement for both algorithms and medicine itself.
Citation: Kim, YT., Kim, H., Bahl, M. et al. Defining operational safety in clinical artificial intelligence systems. npj Digit. Med. 9, 281 (2026). https://doi.org/10.1038/s41746-026-02450-7
Keywords: clinical artificial intelligence, operational safety, medical imaging, decision support, risk stratification